Wave Professional Tutorials

wave professional instrukcija

How to Use the Wave Professional Sharpener

Step-by-Step Instructions
Step One
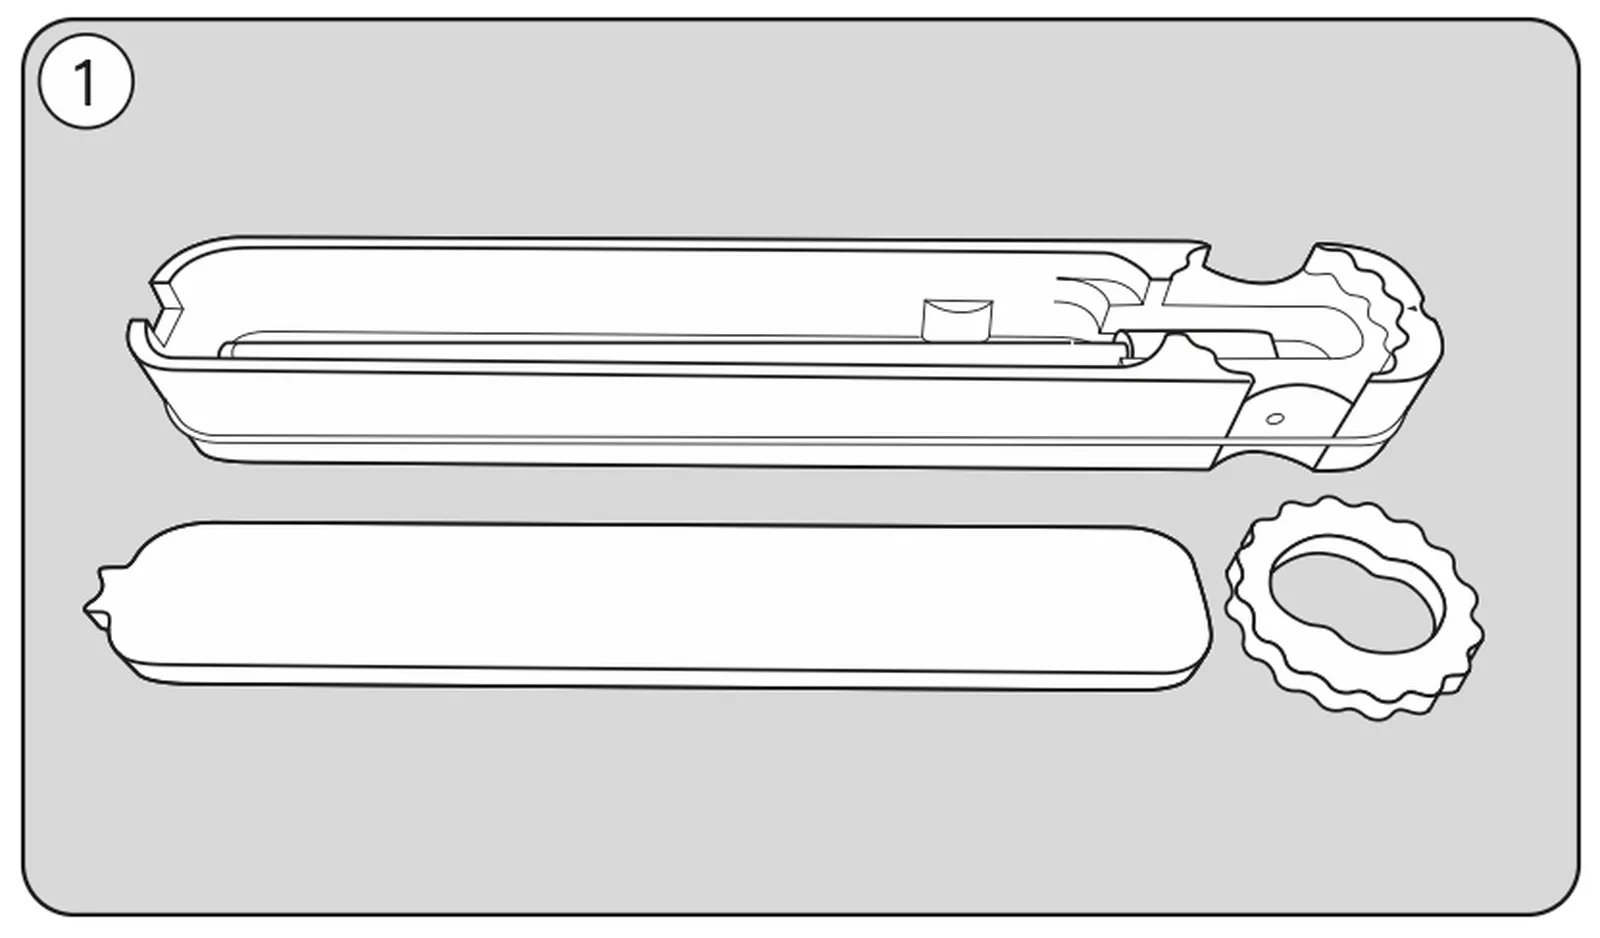
Open the Wave Professional sharpener case

Move the elastic band to one side of the case.
Remove the cover and the sharpening angle adjustment wheel.

Step Two
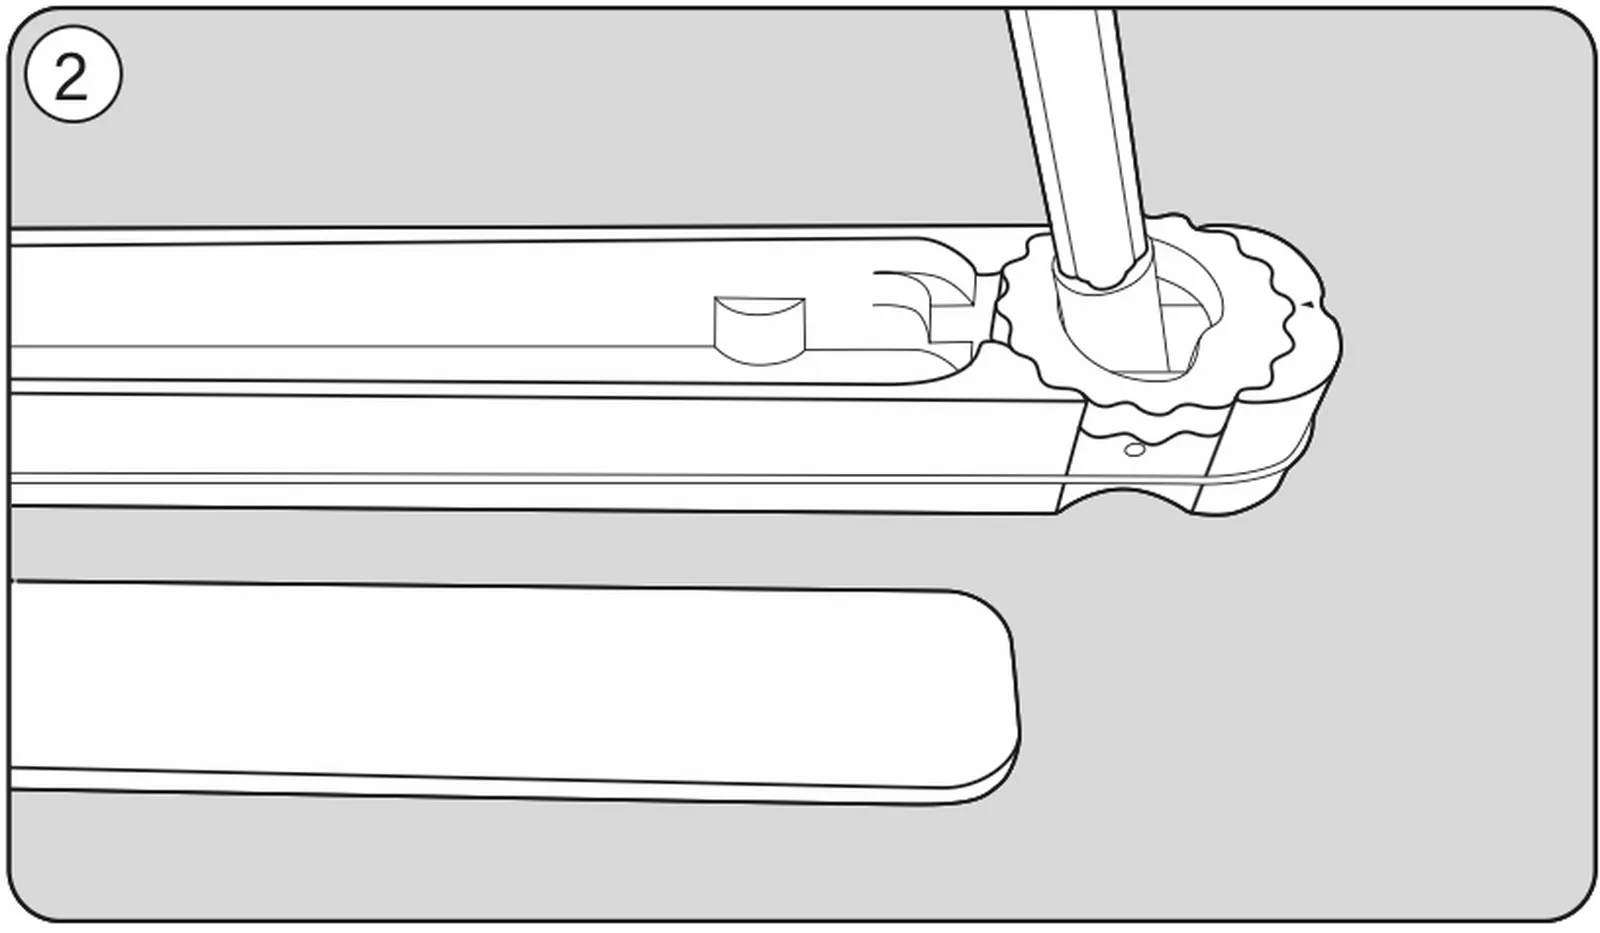
Set the sharpening angle on the Wave Professional sharpener

Lift the ceramic rod vertically and install the adjustment wheel so that the triangle on the body points to your chosen sharpening angle.
You can find the recommended sharpening angles on the case cover.

Step Three
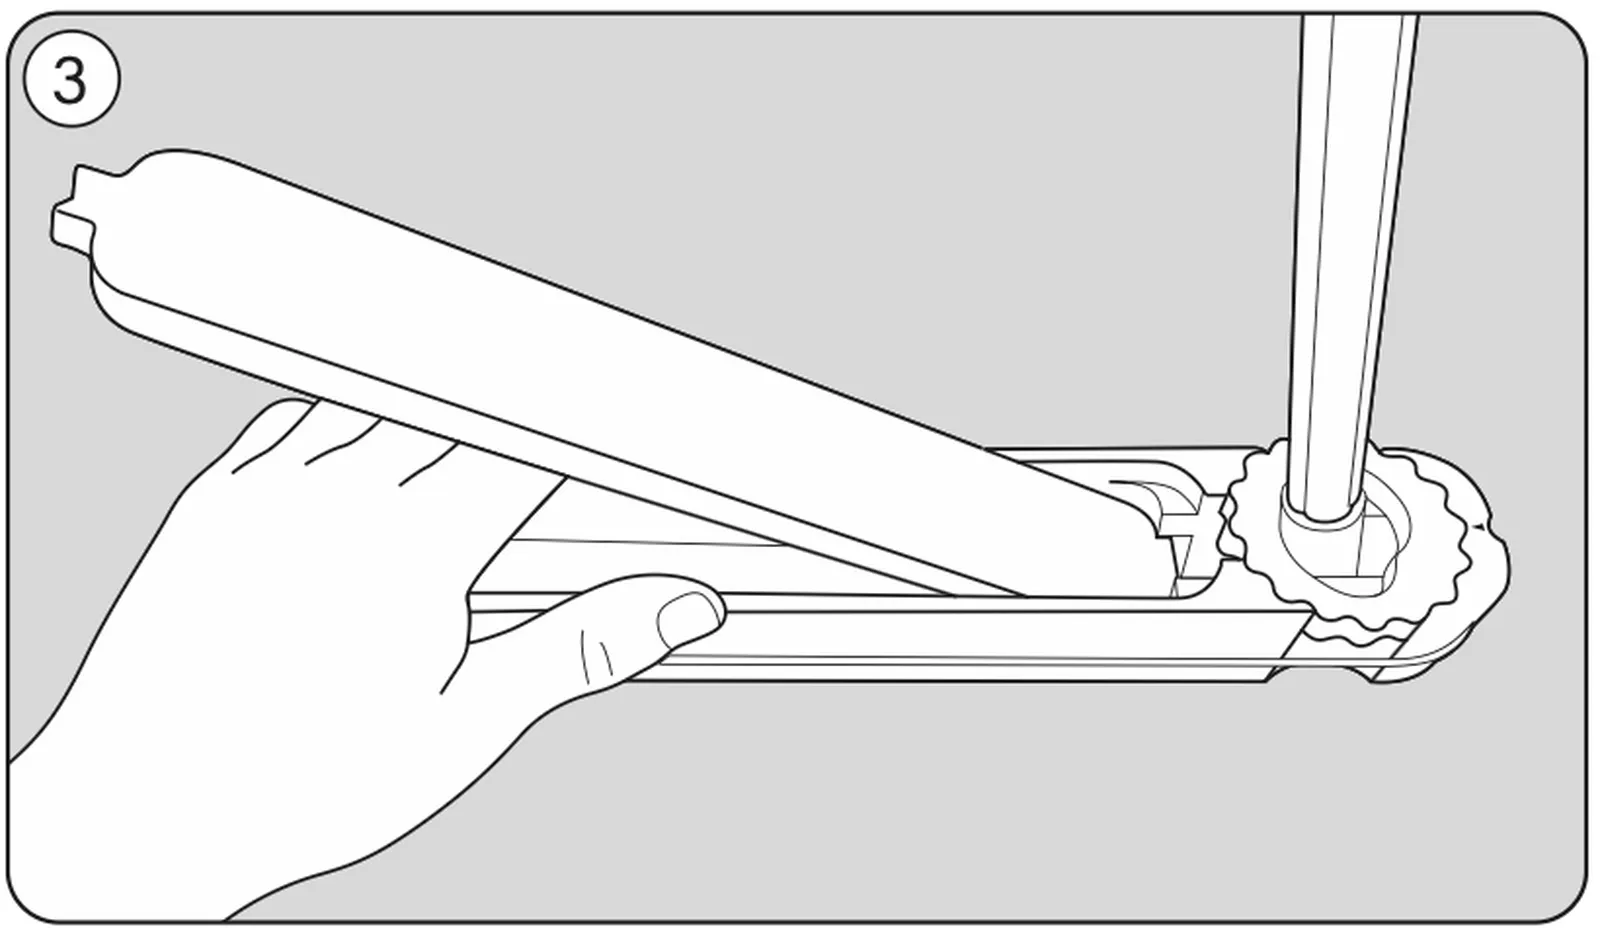
Place the cover in the hand protection position

Place the cover in the hand protection position.

Step Four
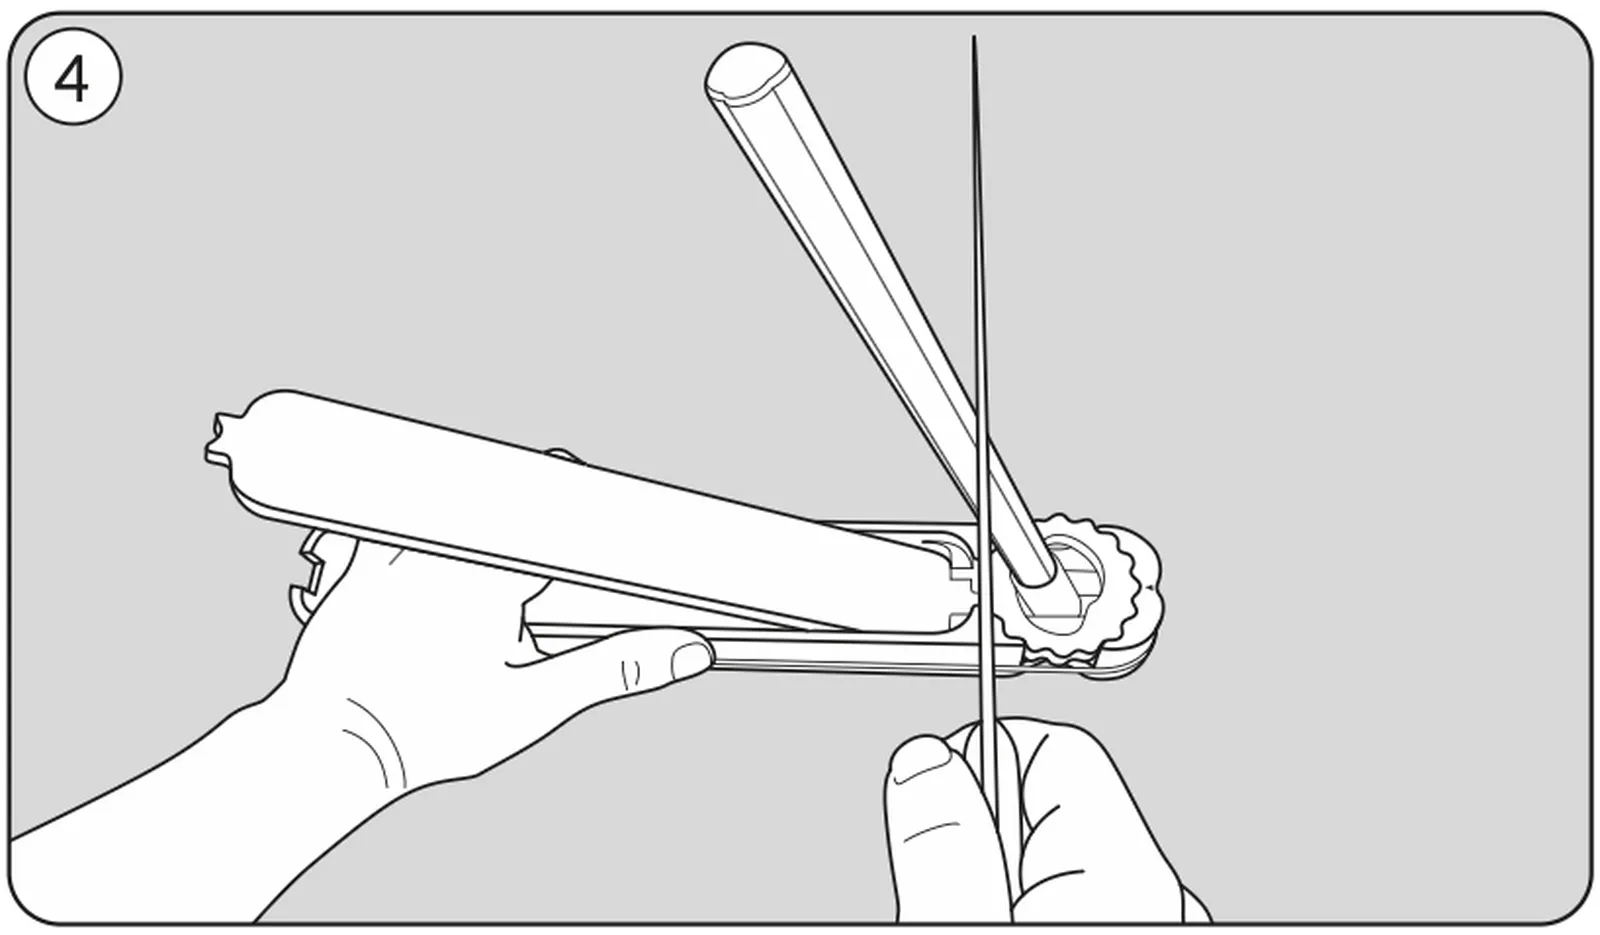
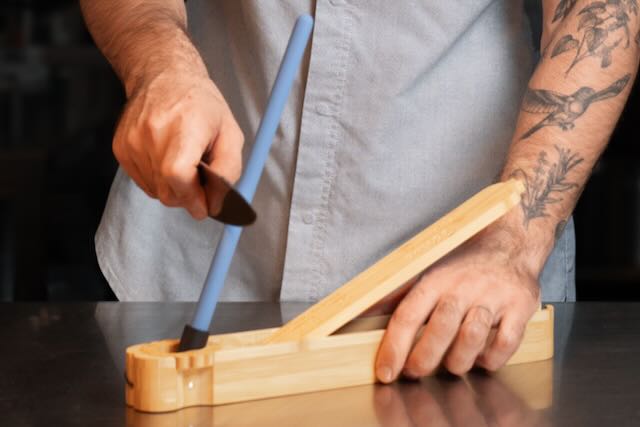
Wave Professional sharpening technique

Holding the knife vertically, make 5 strokes with the blade along the right side of the blue ceramic rod, moving from the heel of the blade to the tip.
Move the rod to the right and make 5 strokes along the left side of the blue ceramic rod.
Then make:
  • 4 strokes on the right and 4 on the left;
  • 3 on the right and 3 on the left;
  • 2 on the right and 2 on the left;
  • finally, 1 stroke on each side.
Finish by making several more single strokes, constantly alternating sides and applying minimal pressure.
If the knife is still not sharp enough, repeat the entire process from the beginning.

🎥 Video Instructions

How to Speed Up Sharpening for Very Dull Knives
If the knife is very dull, you can speed up the sharpening process using the blue ceramic rod.
Use both downward and upward strokes while keeping the blade in constant contact with the rod.
You can also apply more pressure and concentrate on the dullest parts of the blade—usually the areas that come into contact with the cutting board most often, especially the belly of the blade.
To speed up the sharpening process even further, occasionally rotate the blue ceramic rod around its axis. This allows the blade to contact a cleaner, less clogged section of the rod, making sharpening faster and more efficient.
Continue sharpening until a burr forms along one side of the cutting edge.
Then switch sides and continue until a burr forms on the opposite side.
Try to make approximately the same number of strokes on both sides so that the cutting edge remains symmetrical.
To finish, remove the burr by making several alternating strokes on each side while gradually reducing the pressure to a minimum.

Cleaning the Ceramic Rod
In the areas where the ceramic rod comes into contact with the blade, its surface gradually becomes clogged with steel particles, causing the rod to sharpen more slowly.
For this reason, it is recommended to clean the ceramic rod periodically.
Any common kitchen cleaning product can be used for this purpose.
Apply the cleaner to the rough side of a kitchen sponge and scrub the areas of the rod where grey metal marks have appeared.
This site is registered on wpml.org as a development site. Switch to a production site key to remove this banner.